Intro
Now that you have created a Windows Server virtual machine in the Getting Started guide, its time to create a client that you can join into your Active Directory domain.
How does it work?
When you create a Windows client you are pretty much creating a machine on the server that will be part of your private network, this machine will act like any other windows desktop you are used too, and can be used by you to simulate joining a machine into an active directory domain.
Cloning the Machine
- On your proxmox dashboard locate the template named
150 (Windows11-Enterprise) - Right click on this machine, and select clone.
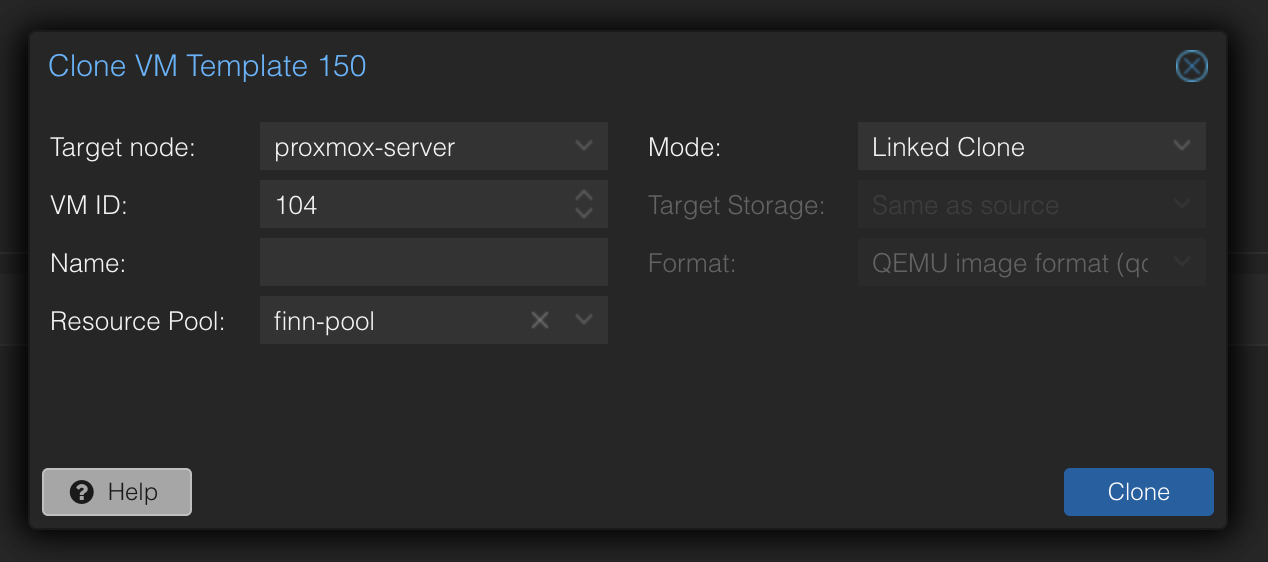
- Select your resource pool, and name it whatever you want.
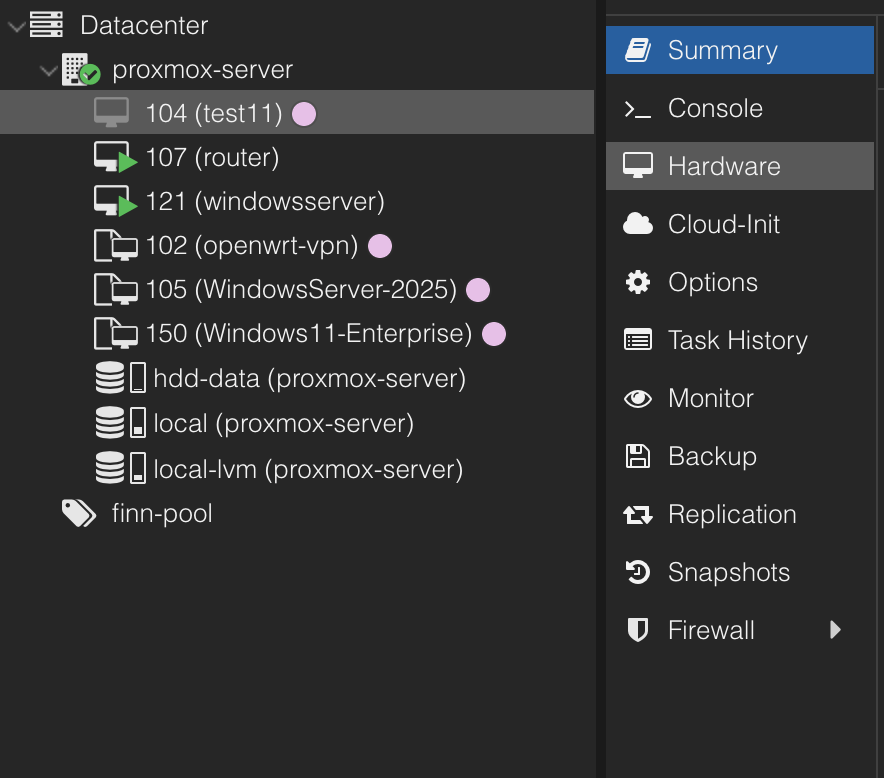
- After this is complete, find the new virtual machine you created. And open the hardware section as shown below.
- Select Network Device (net0) and click on Edit
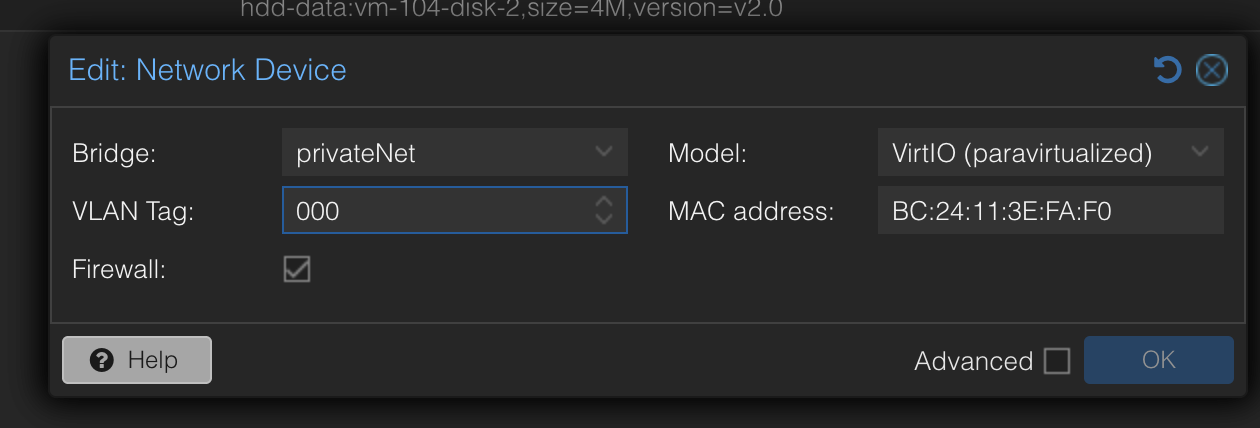
- Change the VLAN Tag to the VM-ID of your virtual router. In my case, as we can see in the picture above, i would put in a VM-ID of 107.
- Click OK
Starting the VM and Connecting
- Start the VM like normal, by pressing the start button in the top right corner on your proxmox control panel.
- Connect to the virtual machine by clicking the console button, then opening the pve-spice file that is downloaded. If this does not work please check that you have the spice client installed on your computer here: Apps needed on PCs
When working with windows clients, using your stationary PC is HIGHLY recommended.
When using your laptop over WiFi you may experience lagging, and the SPICE client crashing.
If issues occur, just close the SPICE client, and press the console button again.
Result
You are now connected to a Windows machine, that is within your private network, that would act like any other physical windows machine. If you can’t connect to the internet remember that you need DHCP setup on your windows server, or you need to input an IP manually. Please double check you have set the correct VLAN tag if you get no internet connection.